|
Moulding and Casting |
||
|
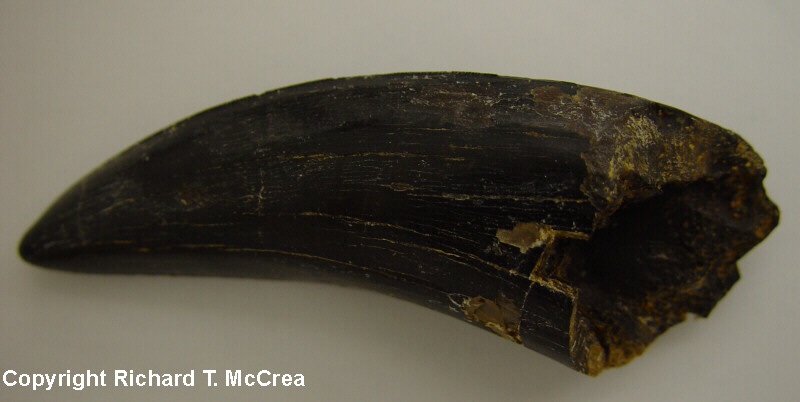
When a dinosaur bone is found it is sometimes desirable to make a replica cast for a variety of purposes. Sometimes it is not practical or safe to put original material in museum displays and replica casts are often employed for this purpose. Replica casts can also be sent to other researchers for study without having to expose the precious original to a perilous journey. There are several steps to making replica casts and some replicas can get pretty complex so that only highly trained and experienced technicians can make them. Some replica casts are fairly simple to make, such as those requiring a single or two-part mould. The example below is the creation of a replica cast of a tyrannosaur tooth (Albertosaurus sp.) for the Dinosaur Camp (Tyrannosaur Camp).
STEP ONE Preparing the tooth for moulding This tyrannosaur tooth is one that does not have a root and has a bit of damage including missing a large part of the base of the tooth. It is sometimes necessary to do a bit of reconstruction of a fossil in order to make the replica (especially a display piece) look presentable. This may not be necessary in the case of research casts.
Tyrannosaur tooth with part of base missing on one side. Since this is for a kid's Dinosaur Camp it was decided to reconstruct the tooth a bit to make it an attractive display piece and keepsake.
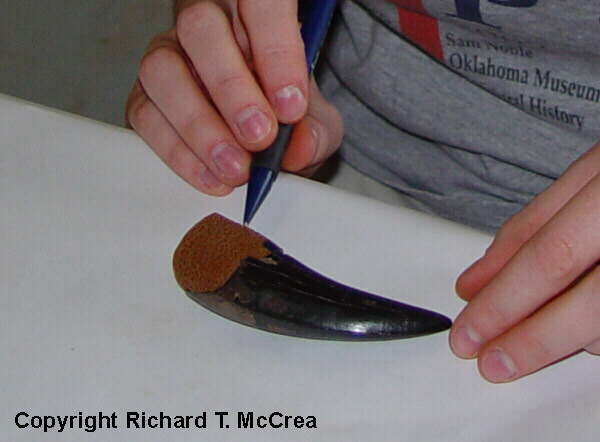
The missing parts of the tooth are filled in with modeling clay and reconstructed parts are pitted to show that these areas were reconstructed.
STEP TWO Preparing the first half of the two part mould The master mould will be made by painting liquid latex onto the original tooth. Since the tooth is a fairly simple 3-D fossil a two part mould will be created. If the fossil is very complex moulds may have to be made in three or more parts. A two part mould can only be prepared one half at a time. The first half of the tooth to be moulded is left exposed while the other half of the tooth is embedded in modeling clay. Liquid latex is applied to the tooth in thin layers, each of which takes some time to cure.
First, half of the tooth is exposed for moulding while the other half is embedded in modeling clay. Note that the base of the tooth has been built up with clay. When moulded this will form a pour spout through which plaster or some other casting medium can be poured to make a replica cast.
STEP THREE Preparing the second half of the two part mould Once the first half of the mould has cured the specimen is flipped over and the specimen is prepared for the second half of the mould to be made.
The specimen has been flipped and the clay surrounding the tooth will be removed to expose the other half of the tooth.
The modeling clay (except for the reconstructed parts and the pour spout) is carefully removed and the other side of the fossil is cleaned of any clay remnants.
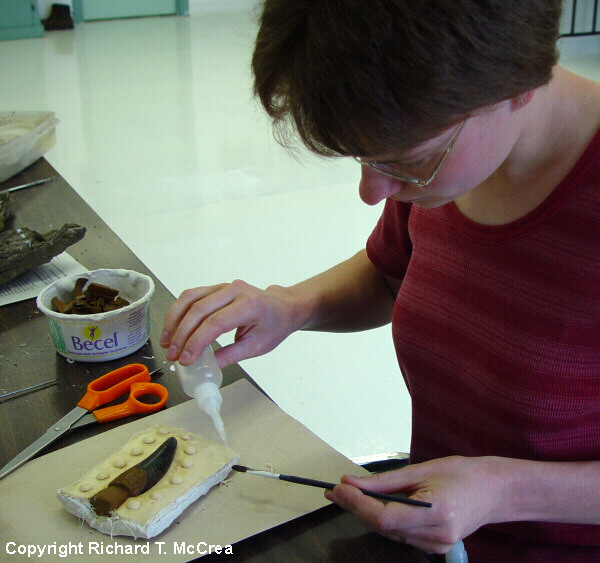
The second half of the tooth is exposed for moulding. Note the first half of the mould is the white rubber material surrounding the tooth on the sides and on the back. The bumps in the rubber were made by punching holes in the clay. The function of the holes is to enable the two halves of the mould to fit together exactly so that the cast will be seamless. Before applying the next layer of latex to form the second half of the two part mould a thin layer of Vinac glue is applied to the surface of the first mould so that the two halves of the mould will separate.
Palaeontologist Lisa Buckley applying Vinac to the mould with a brush before making the second half of the mould.
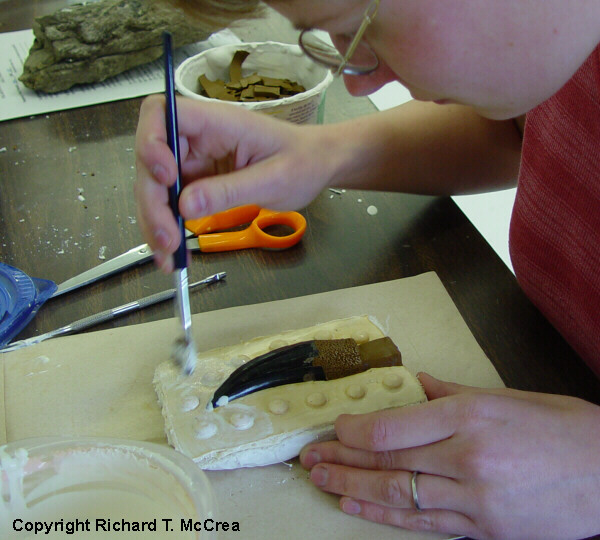
Once the Vinac has set latex can be applied to the second half of the fossil to form the other half of the mould.
Liquid latex is applied in a series of thin layers.
The latex is applied in very thin layers so that each layer cures completely before the next layer is applied. This is a preventative measure that helps keep out soft spots in the mould caused by improperly cured latex. These soft spots can deform and even tear, decreasing the life of the mould significantly.
The tooth and clay are still visible after the first thin coat of latex.
STEP FOUR Demoulding the fossil Once both halves of the mould have cured the fossil is de-moulded and the two halves of the mould are separated. The tooth can then be cleaned up and put back into collections.
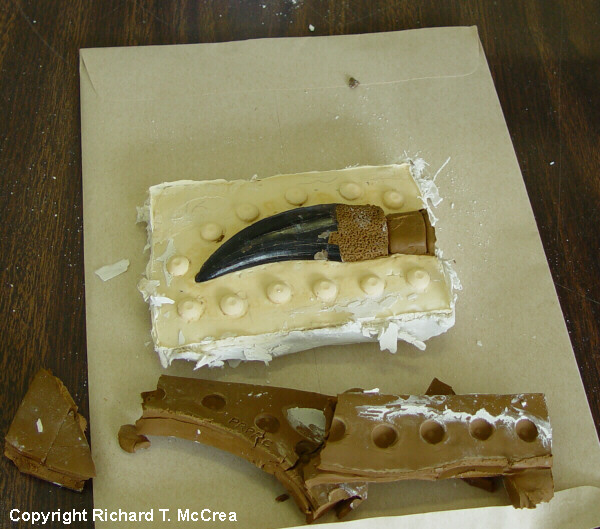
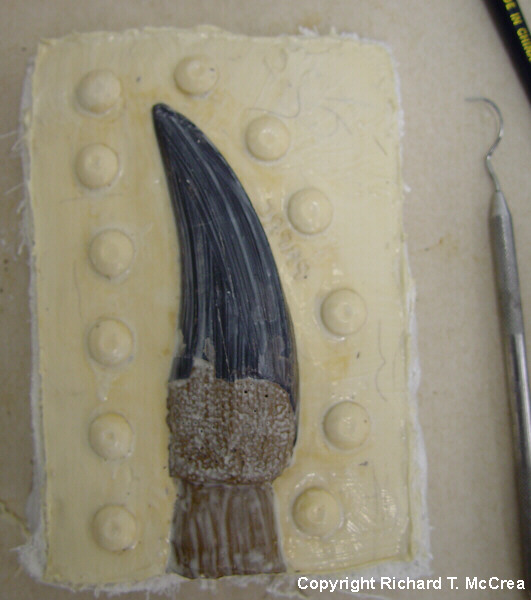
The fossil tooth is freed and both halves of the mould preserve all of the surface details of the tooth and may be cast.
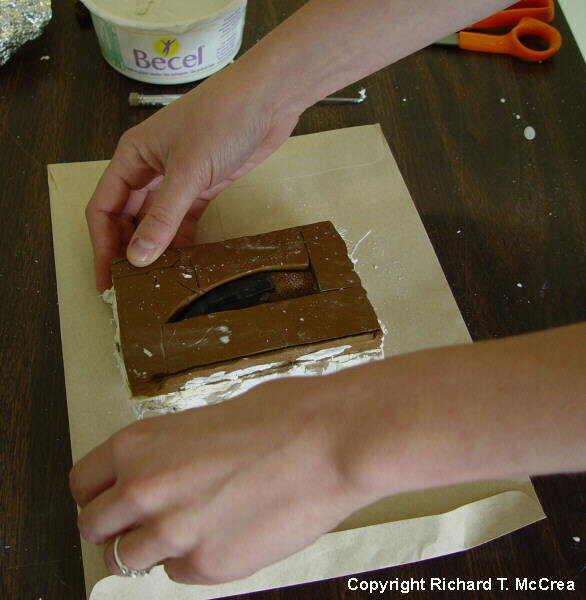
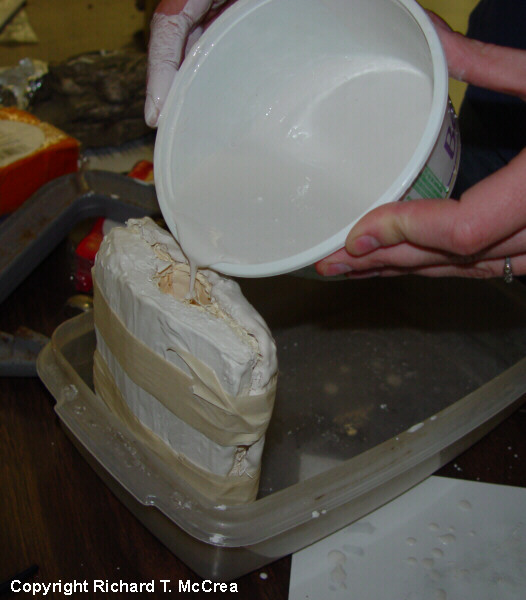
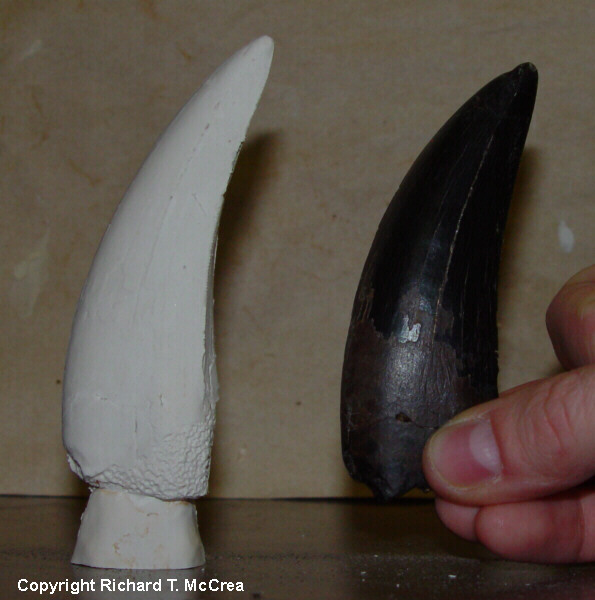
STEP FIVE Creating the "Master" Cast The two halves of the mould (often provided with a support jacket of plaster or fibreglass to help preserve the mould's shape) may be fit together and have the casting medium (plaster, epoxy resin, etc.,...) poured into the pour spout to create the first replica cast which is called the Master Cast. In the case of the tyrannosaur tooth the Master Cast was made of FGR (Fibreglass Reinforced) plaster. The consistency of the plaster is very important, and it is also important that no bubbles be allowed to form as these will show up on the replica. The plaster was carefully poured into the two part mould and allowed time to set up. Once the plaster had dried the two halves of the mould could be removed to expose the newly formed replica cast, which is identical in size, shape and every surface detail to the original. The replica cast can even be painted to the exact colour of the original fossil.
A plaster mixture is carefully poured into the the mould which is supported by an external plaster jacket used to help hold the shape of the mould
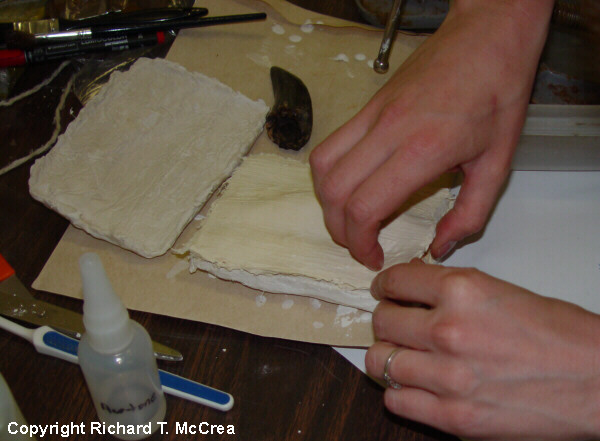
Once the plaster has set the two halves of the mould are carefully removed.
The mould is removed revealing the FGR plaster replica cast
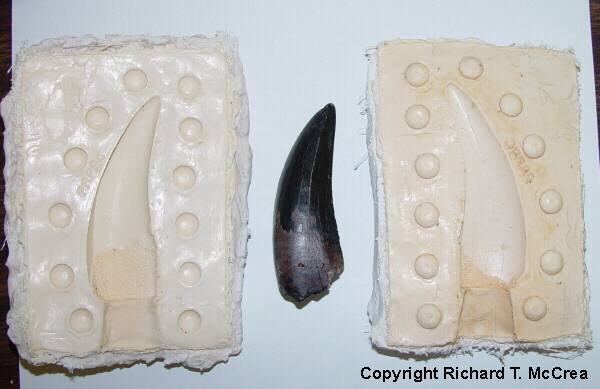
The replica cast (left) and the original tooth side by side for comparison. |